Using Cadasio you can create a fully interactive, engaging online experience for your end users. As you do this you will have created 2D images to use in traditional documents and you can also save out a movie file. These means you are getting 3 different outputs per project to offer your end users a range of options to digest your assembly and service instructions.
To get started saving a video file, ensure you are in the Cadasio designer, go to the Tools Tab on the left hand side and pick Publish Video.
Recording a video within your browser is new technology and not all browsers support it yet so we recommend using the latest versions of Chrome or Firefox. There are two ways to create a video, automatic and manual. No matter which method you choose you will need to give permission.
Browser Permission
Once you open the Publish Video options you will be presented with the following

Since Cadasio is browser based, to create the movie we record your screen. To do this you are required to give your browser permission. Click the Permission button on the Publish Video options and a prompt will appear. Depending on the browser you are using you will see different options.
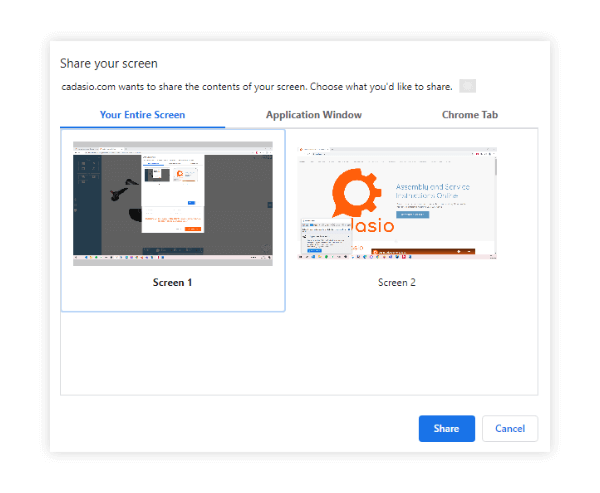
In Chrome, a nice visual display is shown whereby you can pick an entire screen, a specific application or a tab.
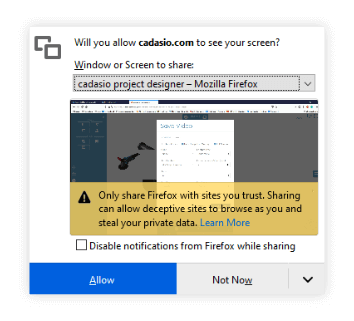
And here's how it looks in Firefox. You will see a drop down list of your windows and applications, and when you pick one a small thumbnail preview will display.
Depending on what you choose you may record more than intended, so always review your videos afterwards. It’s also worth pointing out that Cadasio has no access and never stores any videos that you create.
You will generally want to choose the application window, however picking your entire screen can also work, making sure you pick the monitor that has Cadasio currently on.
Which ever browser you are using, you will see a pop up appear to indicate you are now sharing your screen, you will want to hide this to ensure it does not get captured in your recording.


Automatic Capture
The automatic mode will play your steps in order and you can choose whether you are recording all your steps or just a range. You have options to control the step duration and the pause between steps so you can get the look you want. With automatic captures you will most likely want to ensure hide cursor, hide navigation overlay and full screen are all ticked.
When you are happy to proceed, click Start. A count down timer will begin and then your steps will play and be recorded. If you have chosen to hide your cursor, it is recommended to take your hand off your mouse to avoid moving it accidentally, which, for inbuilt security reasons in the browser, can cause it to reappear. When it has got to the last step you will see a download available of your movie.
Check out a quick example of an automatic video below
Manual Capture
Choosing to record a manual video allows you to run though the steps yourself and stop the recoding when you are happy. You can even choose to record your microphone, allowing you to talk over your steps. Just like the automatic recording, you will need to grant permission, and then you are free to step through your steps. When you are ready to finishing the recording simply press Enter.
Below is an example of a manual video, the voiceover was captured using the option to record the microphone, which avoided having to add it afterwards with additional software.
File Types
By default we save videos as WebM files. WebM is a great video format, whose development is sponsored by Google. It offers high quality videos, is relatively compact in size, and is perfect for video streaming and using with YouTube. All the mainstream web browsers support it and videos in this format can be easily played even on machines with low technical characteristics. Not all video editing software can work with WebM yet, however support is increasing as the filetype becomes more mainstream. If you would prefer an MP4 simply look at the options in the Publish Video popup. It will take a short amount of time to convert to MP4 and you will be emailed when the conversion is completed.